Manage access tokens#
In BentoCloud, API tokens serve as a key method of authorization. You may use tokens to:
Log in to BentoCloud
Manage BentoCloud resources
Access protected Deployments, which have Authorization enabled
This tutorial explains how to create and use API tokens in BentoCloud.
Create an API token#
To create an API token, perform the following steps:
Navigate to the API Tokens page on the BentoCloud console.
Click Create.
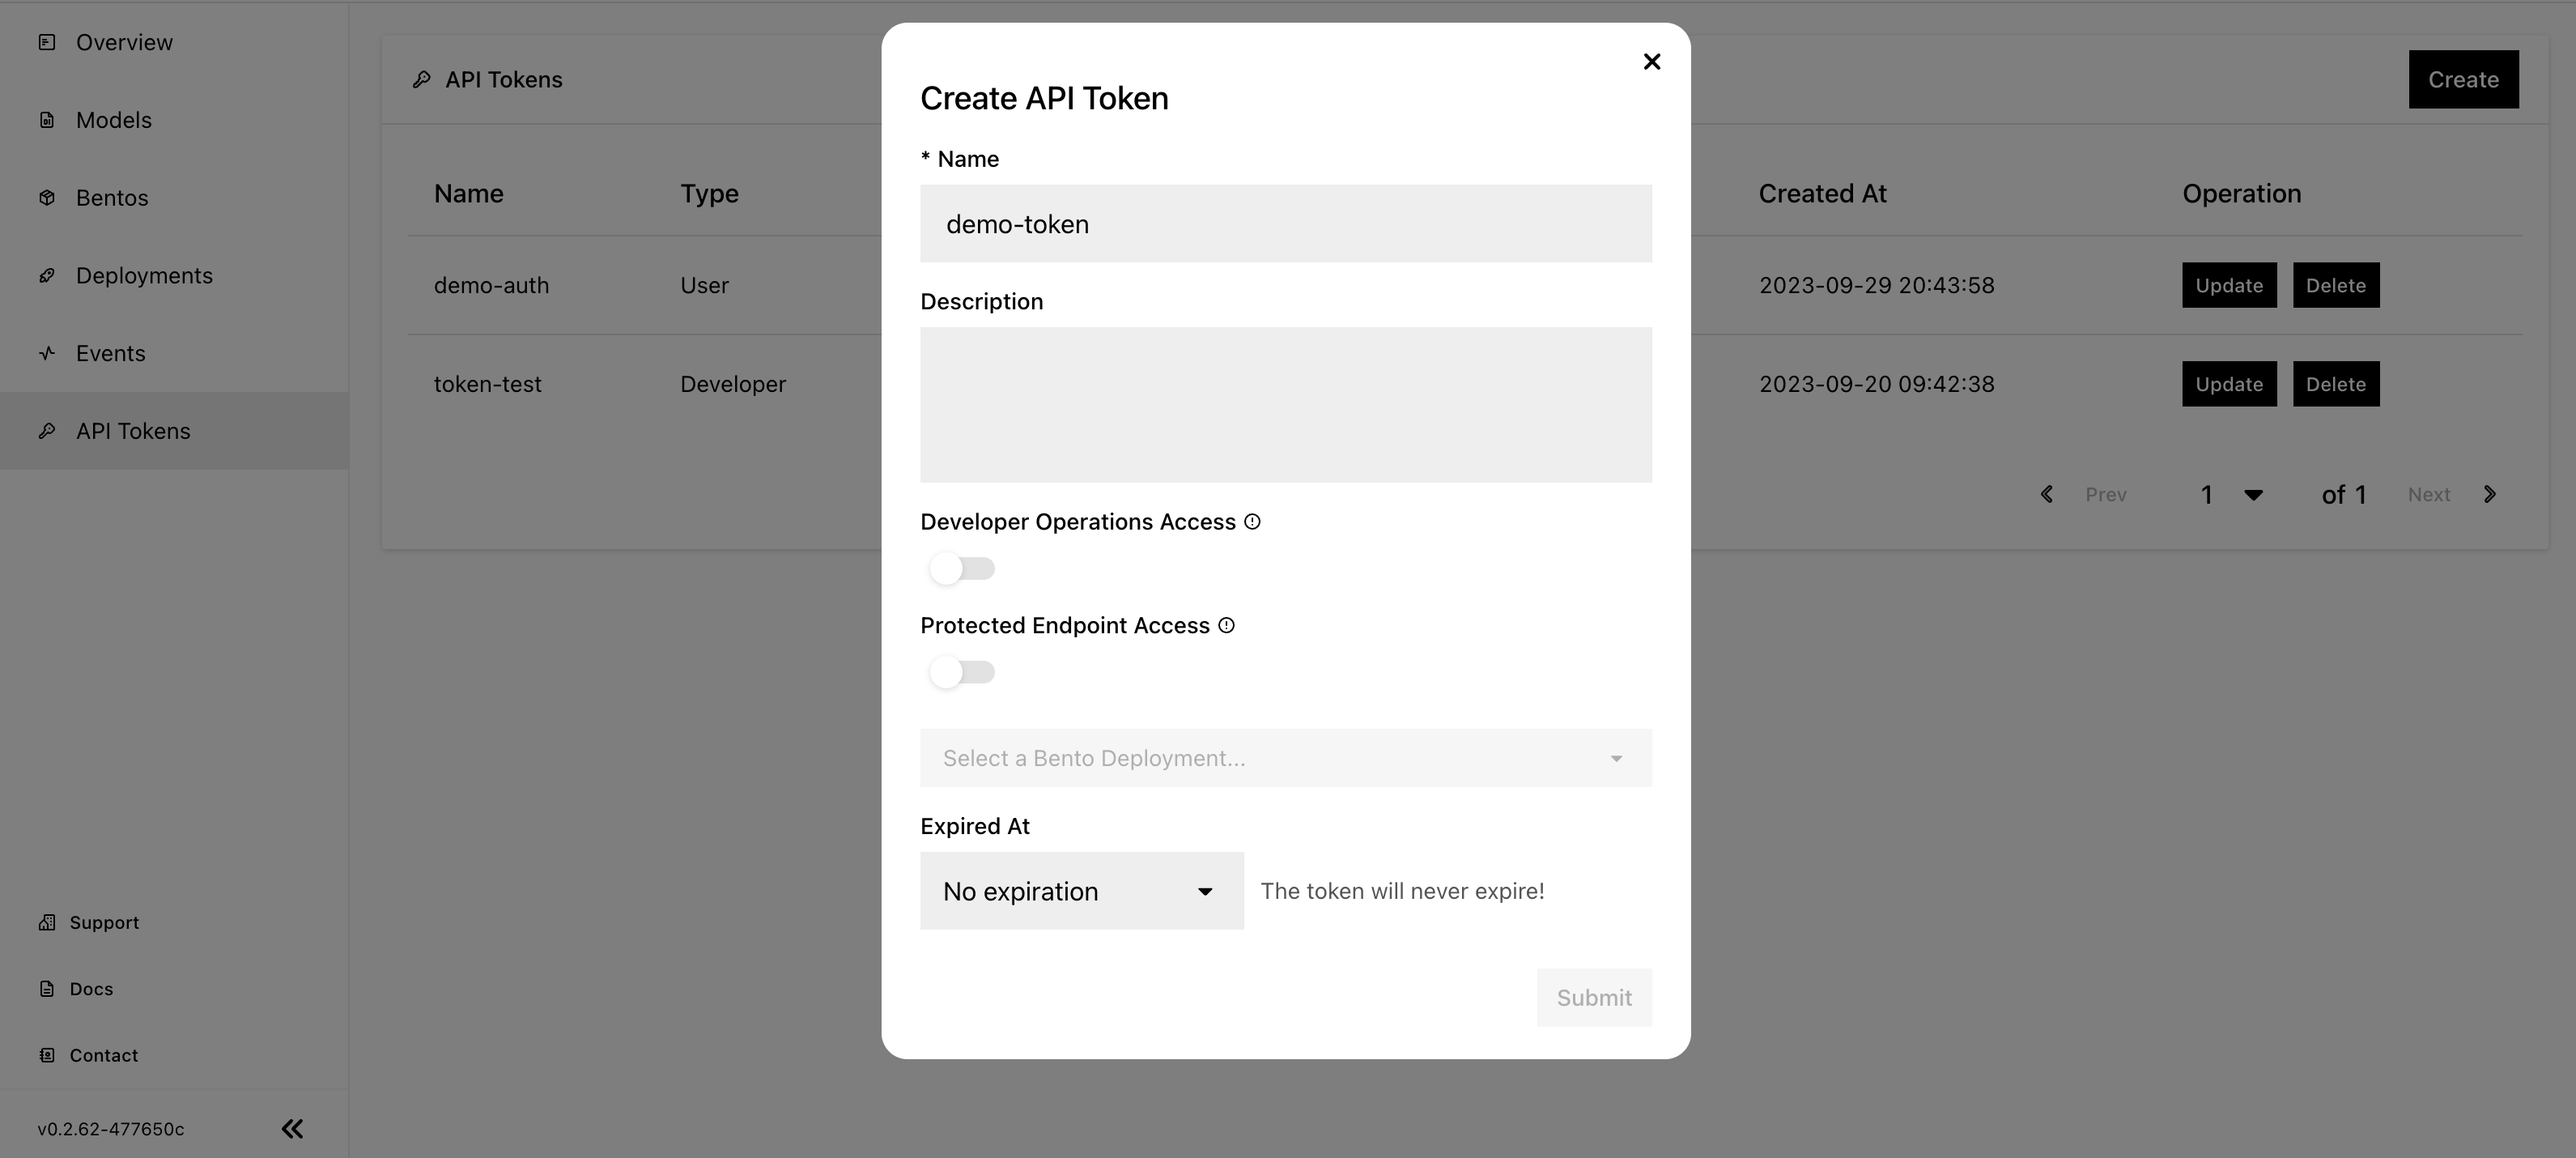
In the dialog that appears, specify the following fields. Note that you must select at least one of the token types.

Name: The name of the API token.
Description: A description of the token, detailing its usage.
Developer Operations Access: Grant permissions to access BentoCloud and manage resources on it.
Protected Endpoint Access: Grant permissions to access Bento Deployments with Protected endpoints. If you select this token type, you need to choose the Deployment that you want the token to access. If you want to use the token to access all the Protected Deployments, select All Deployments.
Expired At: Set an expiration date for the token. You won’t be able to use the token after it expires.
Click Submit.
Record the token. This is the only opportunity to record it.
All available tokens appear on the API Tokens page. Click Delete if you no longer needs a token.
Log in to BentoCloud using the BentoML CLI#
After you create an token with Developer Operations Access, you can interact with BentoCloud programmatically via the BentoML Command Line Interface (CLI). Log in using the following command.
bentoml cloud login --api-token <your-api-token> --endpoint <your-bentocloud-endpoint>
Note
The above command is displayed automatically after you create a token.
Expected output:
Successfully logged in as user "user" in organization "mybentocloud".
To retrieve the current endpoint and API token locally, make sure you have installed jq, and then run:
bentoml cloud current-context | jq '("endpoint:" + .endpoint + ", api_token:" + .api_token)'
After you log in, you should be able to manage BentoCloud resources. For more information on the CLI, see Reference - CLI.
Access protected Deployments#
You can use a token with Protected Endpoint Access to access a protected Bento Deployment. The following example provides different ways to interact with the Quickstart Summarization Service deployed with authorization enabled.
Include the token in the header of your HTTP request.
curl -s -X POST \
   'https://app-name.organization.cloud-apps.bentoml.com/summarize' \
   -H 'Authorization: Bearer $YOUR_TOKEN' \
   -H 'Content-Type: application/json' \
   -d '{
      "text": "Your long text to summarize"
   }'
Set the token parameter in your client.
import bentoml

client = bentoml.SyncHTTPClient("https://app-name.organization.cloud-apps.bentoml.com", token="******")
response = client.summarize(text="Your long text to summarize")
print(response)
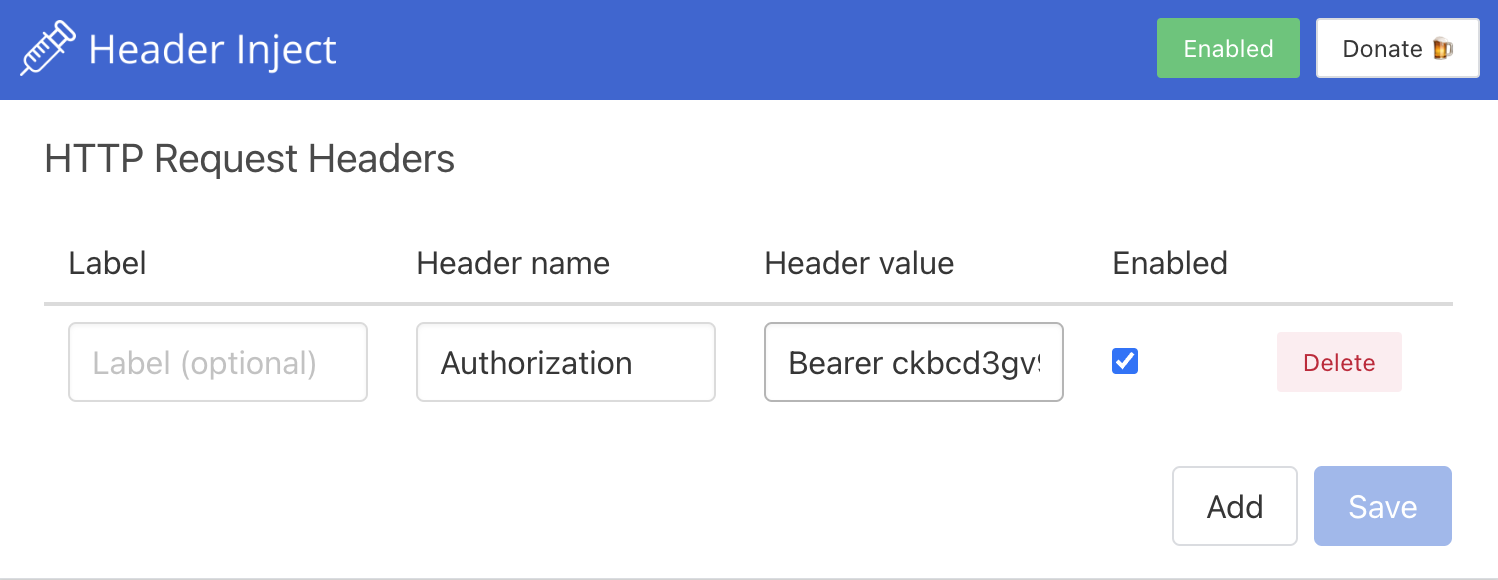
To access a Protected Deployment from a web browser, you can add the token in the header using any browser extension that supports this feature, such as Header Inject in Google Chrome.
Create a User token by following the steps in the Create an API token section above. Make sure you select the desired Deployment that you want the token to access.
Install Header Inject in Google Chrome and enable it.
Select Header Inject, click Add, and specify Header name and Header value.

Header name: Enter
Authorization.Header value: Enter
Bearer $YOUR_TOKEN.
Click Save.
Access the exposed URL of your Protected Deployment again and you should be able to access it.