XTTS: Text to speech#
Text-to-speech machine learning technology can convert written text into spoken words. This may involve analyzing the text, understanding its structure and meaning, and then generating speech that mimics human voice and intonation.
This document demonstrates how to build a text-to-speech application using BentoML, powered by the model XTTS.
All the source code in this tutorial is available in the BentoXTTS GitHub repository.
Prerequisites#
Python 3.9+ and
pipinstalled. See the Python downloads page to learn more.You have a basic understanding of key concepts in BentoML, such as Services. We recommend you read Quickstart first.
(Optional) We recommend you create a virtual environment for dependency isolation. See the Conda documentation or the Python documentation for details.
Install dependencies#
Clone the project repository and install all the dependencies.
git clone https://github.com/bentoml/BentoXTTS.git
cd BentoXTTS
pip install -r requirements.txt
Create a BentoML Service#
Define a BentoML Service to customize the serving logic of the model. You can find the following example service.py file in the cloned repository.
from __future__ import annotations

import os
import typing as t
from pathlib import Path

import torch
from TTS.api import TTS

import bentoml

MODEL_ID = "tts_models/multilingual/multi-dataset/xtts_v2"

sample_input_data = {
    'text': 'It took me quite a long time to develop a voice and now that I have it I am not going to be silent.',
    'language': 'en',
}

@bentoml.service(
    resources={
        "gpu": 1,
        "memory": "8Gi",
    },
    traffic={"timeout": 300},
)
class XTTS:
    def __init__(self) -> None:
        self.tts = TTS(MODEL_ID, gpu=torch.cuda.is_available())

    @bentoml.api
    def synthesize(
            self,
            context: bentoml.Context,
            text: str = sample_input_data["text"],
            lang: str = sample_input_data["language"],
    ) -> t.Annotated[Path, bentoml.validators.ContentType('audio/*')]:
        output_path = os.path.join(context.temp_dir, "output.wav")
        sample_path = "./female.wav"
        if not os.path.exists(sample_path):
            sample_path = "./src/female.wav"

        self.tts.tts_to_file(
            text,
            file_path=output_path,
            speaker_wav=sample_path,
            language=lang,
            split_sentences=True,
        )
        return Path(output_path)
A breakdown of the Service code:
@bentoml.servicedecorates the classXTTSto define it as a BentoML Service, configuring resources (GPU and memory) and traffic timeout.In the class, the
__init__method initializes an instance of theTTSmodel using theMODEL_IDspecified. It checks if a GPU is available and sets the model to use it if so.The
synthesizemethod is defined as an API endpoint. It takescontext,text, andlangas parameters, with defaults provided fortextandlanginsample_input_data. This method generates an audio file from the provided text and language, using the TTS model. It creates an output file path in the temporary directory (temp_dir). A sample WAV file path (sample_path) is used for the TTS process.The Service calls
tts.tts_to_fileto generate the audio file (output.wav) based on the provided text and language.
Run bentoml serve in your project directory to start the Service. Set the environment variable COQUI_TTS_AGREED=1 to agree to the terms of Coqui TTS.
$ COQUI_TOS_AGREED=1 bentoml serve .

2024-01-30T10:06:43+0000 [INFO] [cli] Starting production HTTP BentoServer from "service:XTTS" listening on http://localhost:3000 (Press CTRL+C to quit)
The server is active at http://localhost:3000. You can interact with it in different ways.
curl -X 'POST' \
    'http://localhost:3000/synthesize' \
    -H 'accept: */*' \
    -H 'Content-Type: application/json' \
    -d '{
    "text": "It took me quite a long time to develop a voice and now that I have it I am not going to be silent.",
    "lang": "en"
}'
This client returns the audio file as a Path object. You can use it to access or process the file. See Clients for details.
import bentoml

with bentoml.SyncHTTPClient("http://localhost:3000") as client:
        result = client.synthesize(
            text="It took me quite a long time to develop a voice and now that I have it I am not going to be silent.",
            lang="en"
        )
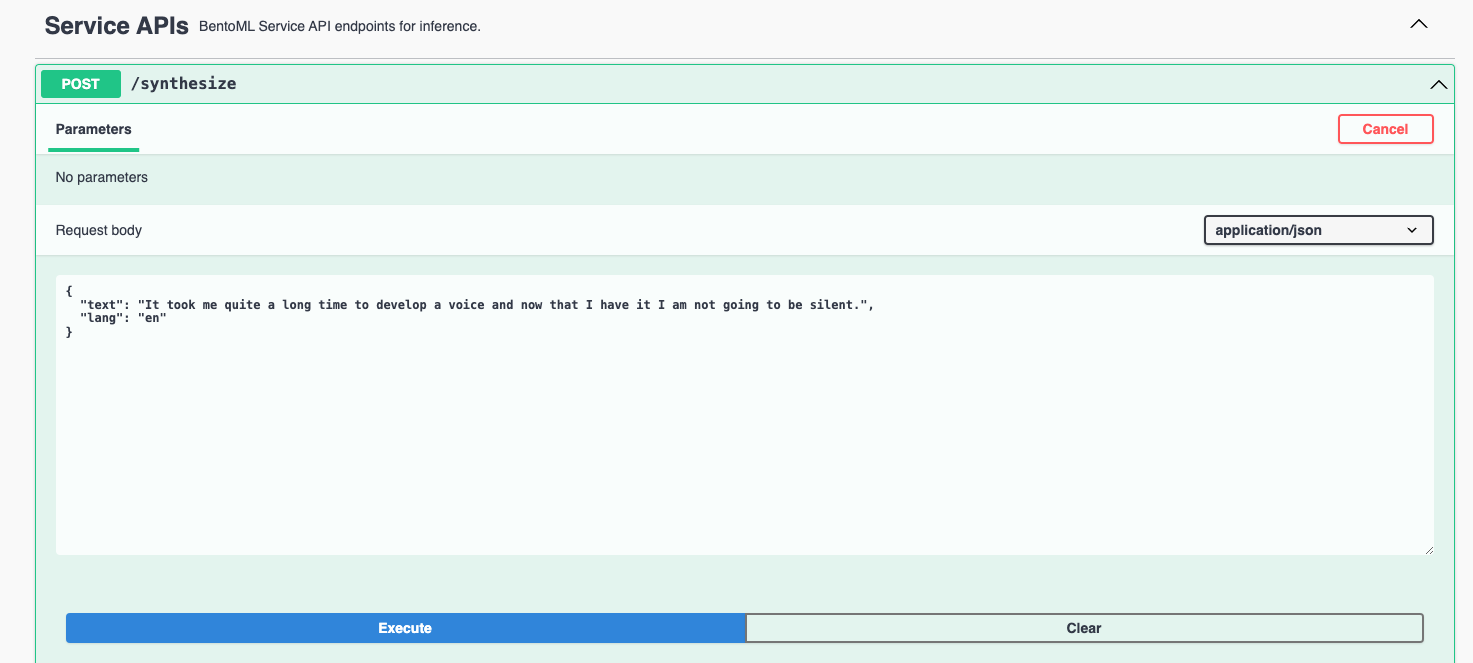
Visit http://localhost:3000, scroll down to Service APIs, and click Try it out. In the Request body box, enter your prompt and click Execute.
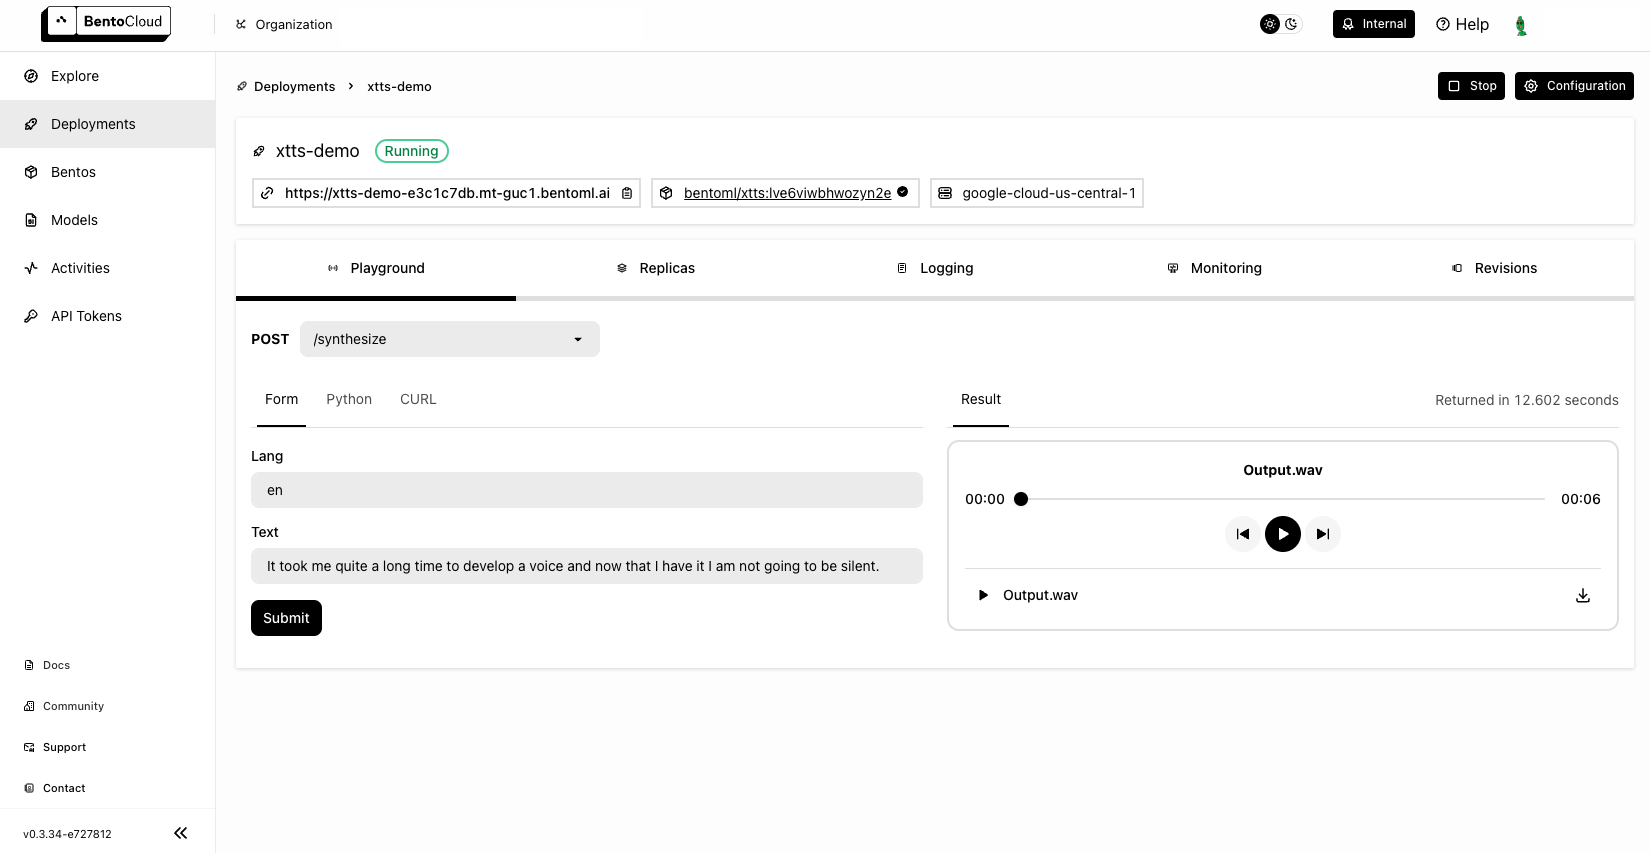
Deploy to BentoCloud#
After the Service is ready, you can deploy the project to BentoCloud for better management and scalability. Sign up for a BentoCloud account and get $30 in free credits.
First, specify a configuration YAML file (bentofile.yaml) to define the build options for your application. It is used for packaging your application into a Bento. Here is an example file in the project:
service: "service:XTTS"
labels:
  owner: bentoml-team
  project: gallery
include:
  - "*.py"
  - "female.wav"
python:
  requirements_txt: requirements.txt
envs:
  - name: "COQUI_TOS_AGREED"
    value: 1
Create an API token with Developer Operations Access to log in to BentoCloud, then run the following command to deploy the project.
bentoml deploy .
Once the Deployment is up and running on BentoCloud, you can access it via the exposed URL.
Note
For custom deployment in your own infrastructure, use BentoML to generate an OCI-compliant image.