Stable Diffusion XL Turbo#
Stable Diffusion XL Turbo (SDXL Turbo) is a distilled version of SDXL 1.0 and is capable of creating images in a single step, with improved real-time text-to-image output quality and sampling fidelity.
This document demonstrates how to create an image generation application with SDXL Turbo and BentoML.
All the source code in this tutorial is available in the BentoSDXLTurbo GitHub repository.
Prerequisites#
Python 3.8+ and
pipinstalled. See the Python downloads page to learn more.You have a basic understanding of key concepts in BentoML, such as Services. We recommend you read Quickstart first.
To run this BentoML Service locally, you need a Nvidia GPU with at least 12G VRAM.
(Optional) We recommend you create a virtual environment for dependency isolation. See the Conda documentation or the Python documentation for details.
Install dependencies#
Clone the project repository and install all the dependencies.
git clone https://github.com/bentoml/BentoSDXLTurbo.git
cd BentoSDXLTurbo
pip install -r requirements.txt
Create a BentoML Service#
Create a BentoML Service in a service.py file to define the serving logic of the model. You can use this example file in the cloned project:
import bentoml
from PIL.Image import Image

MODEL_ID = "stabilityai/sdxl-turbo"

sample_prompt = "A cinematic shot of a baby racoon wearing an intricate italian priest robe."

@bentoml.service(
    traffic={"timeout": 300},
    workers=1,
    resources={
        "gpu": 1,
        "gpu_type": "nvidia-l4",
        # You can also specify GPU memory requirement:
        # "memory": "16Gi",
    },
)
class SDXLTurbo:
    def __init__(self) -> None:
        from diffusers import AutoPipelineForText2Image
        import torch

        self.pipe = AutoPipelineForText2Image.from_pretrained(
            MODEL_ID,
            torch_dtype=torch.float16,
            variant="fp16",
        )
        self.pipe.to(device="cuda")

    @bentoml.api
    def txt2img(
            self,
            prompt: str = sample_prompt,
            num_inference_steps: int = 1,
            guidance_scale: float = 0.0,
    ) -> Image:
        image = self.pipe(
            prompt=prompt,
            num_inference_steps=num_inference_steps,
            guidance_scale=guidance_scale,
        ).images[0]
        return image
In the Service code, the @bentoml.service decorator is used to define the SDXLTurbo class as a BentoML Service. It loads the pre-trained model (MODEL_ID) using the torch.float16 data type. The model pipeline (self.pipe) is moved to a CUDA-enabled GPU device for efficient computation.
The txt2img method is an API endpoint that takes a text prompt, number of inference steps, and a guidance scale as inputs. It uses the model pipeline to generate an image based on the given prompt and parameters.
Note
SDXL Turbo is capable of performing inference with just a single step. Therefore, setting num_inference_steps to 1 is typically sufficient for generating high-quality images. Additionally, you need to set guidance_scale to 0.0 to deactivate it as the model was trained without it. See the official release notes to learn more.
Run bentoml serve to start the BentoML server.
$ bentoml serve service:SDXLTurbo

2024-01-19T07:20:29+0000 [WARNING] [cli] Converting 'SDXLTurbo' to lowercase: 'sdxlturbo'.
2024-01-19T07:20:29+0000 [INFO] [cli] Starting production HTTP BentoServer from "service:SDXLTurbo" listening on http://localhost:3000 (Press CTRL+C to quit)
The server is active at http://localhost:3000. You can interact with it in different ways.
curl -X 'POST' \
    'http://localhost:3000/txt2img' \
    -H 'accept: image/*' \
    -H 'Content-Type: application/json' \
    --output output.png \
    -d '{
    "prompt": "A cinematic shot of a baby racoon wearing an intricate italian priest robe.",
    "num_inference_steps": 1,
    "guidance_scale": 0
}'
This client returns the image as a Path object. You can use it to access, read, or process the file. See Clients for details.
import bentoml

with bentoml.SyncHTTPClient("http://localhost:3000") as client:
        result = client.txt2img(
            prompt="A cinematic shot of a baby racoon wearing an intricate italian priest robe.",
            num_inference_steps=1,
            guidance_scale=0.0
        )
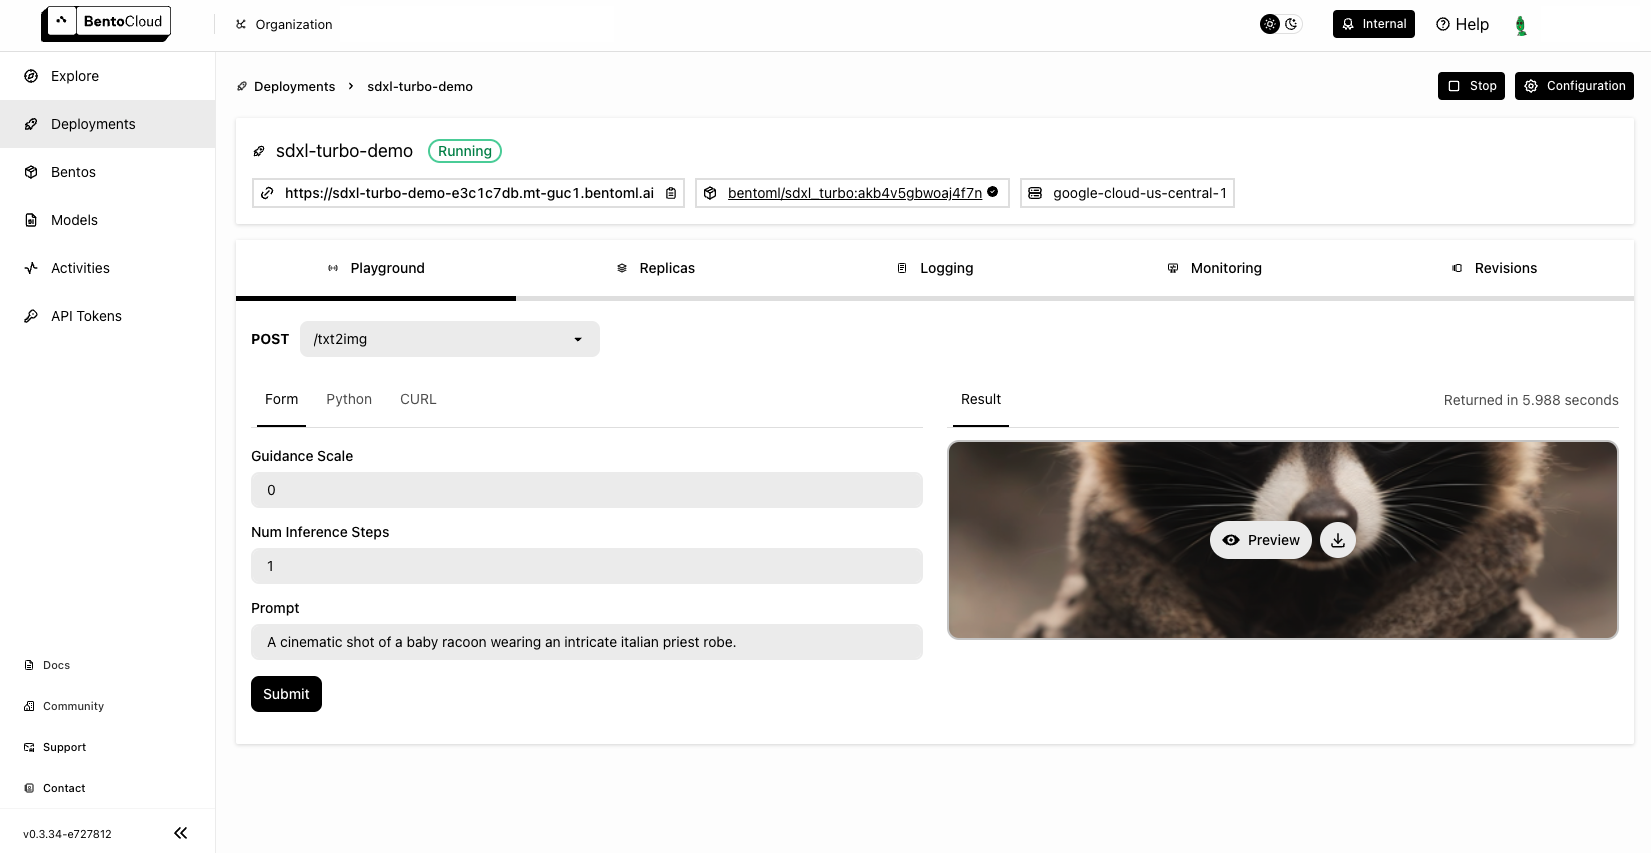
Visit http://localhost:3000, scroll down to Service APIs, specify the parameters, and click Execute.

Expected output:

Deploy to BentoCloud#
After the Service is ready, you can deploy the project to BentoCloud for better management and scalability. Sign up for a BentoCloud account and get $30 in free credits.
First, specify a configuration YAML file (bentofile.yaml) to define the build options for your application. It is used for packaging your application into a Bento. Here is an example file in the project:
service: "service:SDXLTurbo"
labels:
  owner: bentoml-team
  project: gallery
include:
- "*.py"
python:
  requirements_txt: "./requirements.txt"
Create an API token with Developer Operations Access to log in to BentoCloud, then run the following command to deploy the project.
bentoml deploy .
Once the Deployment is up and running on BentoCloud, you can access it via the exposed URL.
Note
For custom deployment in your own infrastructure, use BentoML to generate an OCI-compliant image.