Stable Video Diffusion#
Stable Video Diffusion (SVD) is a latent diffusion model developed by Stability AI. It’s designed to generate short video clips from a still image. Specifically, the model can create 25 frames at a resolution of 576x1024 from a context frame of the same size.
This document demonstrates how to create a video generation server with SVD and BentoML.
All the source code in this tutorial is available in the BentoSVD GitHub repository.
Prerequisites#
Python 3.9+ and
pipinstalled. See the Python downloads page to learn more.You have a basic understanding of key concepts in BentoML, such as Services. We recommend you read Quickstart first.
To run this BentoML Service locally, you need a Nvidia GPU with at least 16G VRAM.
(Optional) We recommend you create a virtual environment for dependency isolation. See the Conda documentation or the Python documentation for details.
Install dependencies#
Clone the project repository and install all the dependencies.
git clone https://github.com/bentoml/BentoSVD.git
cd BentoSVD
pip install -r requirements.txt
Create a BentoML Service#
Create a BentoML Service in a service.py file to define the serving logic of the model. You can use this example file in the cloned project:
from __future__ import annotations

import os
import typing as t
from pathlib import Path
from PIL.Image import Image

import bentoml

MODEL_ID = "stabilityai/stable-video-diffusion-img2vid-xt"


@bentoml.service(
    resources={
        "gpu": 1,
        "gpu_type": "nvidia-l4",
    },
    traffic={"timeout": 600},
)
class StableDiffusionVideo:

    def __init__(self) -> None:
        import torch
        import diffusers

        self.pipe = diffusers.StableVideoDiffusionPipeline.from_pretrained(
            MODEL_ID, torch_dtype=torch.float16, variant="fp16"
        )
        self.pipe.to("cuda")


    @bentoml.api
    def generate(
            self, context: bentoml.Context,
            image: Image,
            decode_chunk_size: int = 2,
            seed: t.Optional[int] = None,
    ) -> t.Annotated[Path, bentoml.validators.ContentType("video/*")]:
        import torch
        from diffusers.utils import load_image, export_to_video

        generator = torch.manual_seed(seed) if seed is not None else None
        image = image.resize((1024, 576))
        image = image.convert("RGB")
        output_path = os.path.join(context.temp_dir, "output.mp4")

        frames = self.pipe(
            image, decode_chunk_size=decode_chunk_size, generator=generator,
        ).frames[0]
        export_to_video(frames, output_path)
        return Path(output_path)
A breakdown of the Service code:
It defines a BentoML Service
StableDiffusionVideousing the@bentoml.servicedecorator, with specified GPU requirements for deployment on BentoCloud, and a timeout of 600 seconds. See Configurations for details.During initialization, the Service loads the model into the
StableVideoDiffusionPipelineand moves it to GPU for efficient computation.It defines an endpoint for video generation using the
@bentoml.apidecorator, taking the following parameters:image: A base image for generating video, which will be resized and converted to RGB format for the SVD model.decode_chunk_size: The number of frames that are decoded at once. A lowerdecode_chunk_sizevalue means reduced memory consumption but may lead to inconsistencies between frames, such as flickering. Set this value based on your GPU resources.seed: A randomly generated number when not specified. Every time you generate a video with the same seed and input image, you will get the exact same output. This is particularly useful for generating reproducible results.context:bentoml.Contextlets you access information about the existing Service context. Thetemp_dirproperty provides a temporary directory to store the generated file.
export_to_videofrom thediffuserspackage converts the frames into a video file stored atoutput_path.The method returns a
Pathobject pointing to the generated video file. The return type is annotated with a content type validator, indicating that the endpoint returns a video file.
Run bentoml serve to start the BentoML server.
$ bentoml serve service:StableDiffusionVideo

2024-02-28T01:01:17+0000 [WARNING] [cli] Converting 'StableDiffusionVideo' to lowercase: 'stablediffusionvideo'.
2024-02-28T01:01:18+0000 [INFO] [cli] Starting production HTTP BentoServer from "service:StableDiffusionVideo" listening on http://localhost:3000 (Press CTRL+C to quit)
The server is active at http://localhost:3000. You can interact with it in different ways.
curl -X 'POST' \
    'http://localhost:3000/generate' \
    -H 'accept: video/*' \
    -H 'Content-Type: multipart/form-data' \
    -F 'image=@assets/girl-image.png;type=image/png' \
    -o generated.mp4 \
    -F 'decode_chunk_size=2' \
    -F 'seed=null'
This client returns the image as a Path object. You can use it to access, read, or process the file. See Clients for details.
import bentoml
from pathlib import Path

with bentoml.SyncHTTPClient("http://localhost:3000") as client:
    result = client.generate(
        decode_chunk_size=2,
        image=Path("girl-image.png"),
        seed=0,
    )
Visit http://localhost:3000, scroll down to Service APIs, click the generate endpoint, specify the parameters, and click Execute.
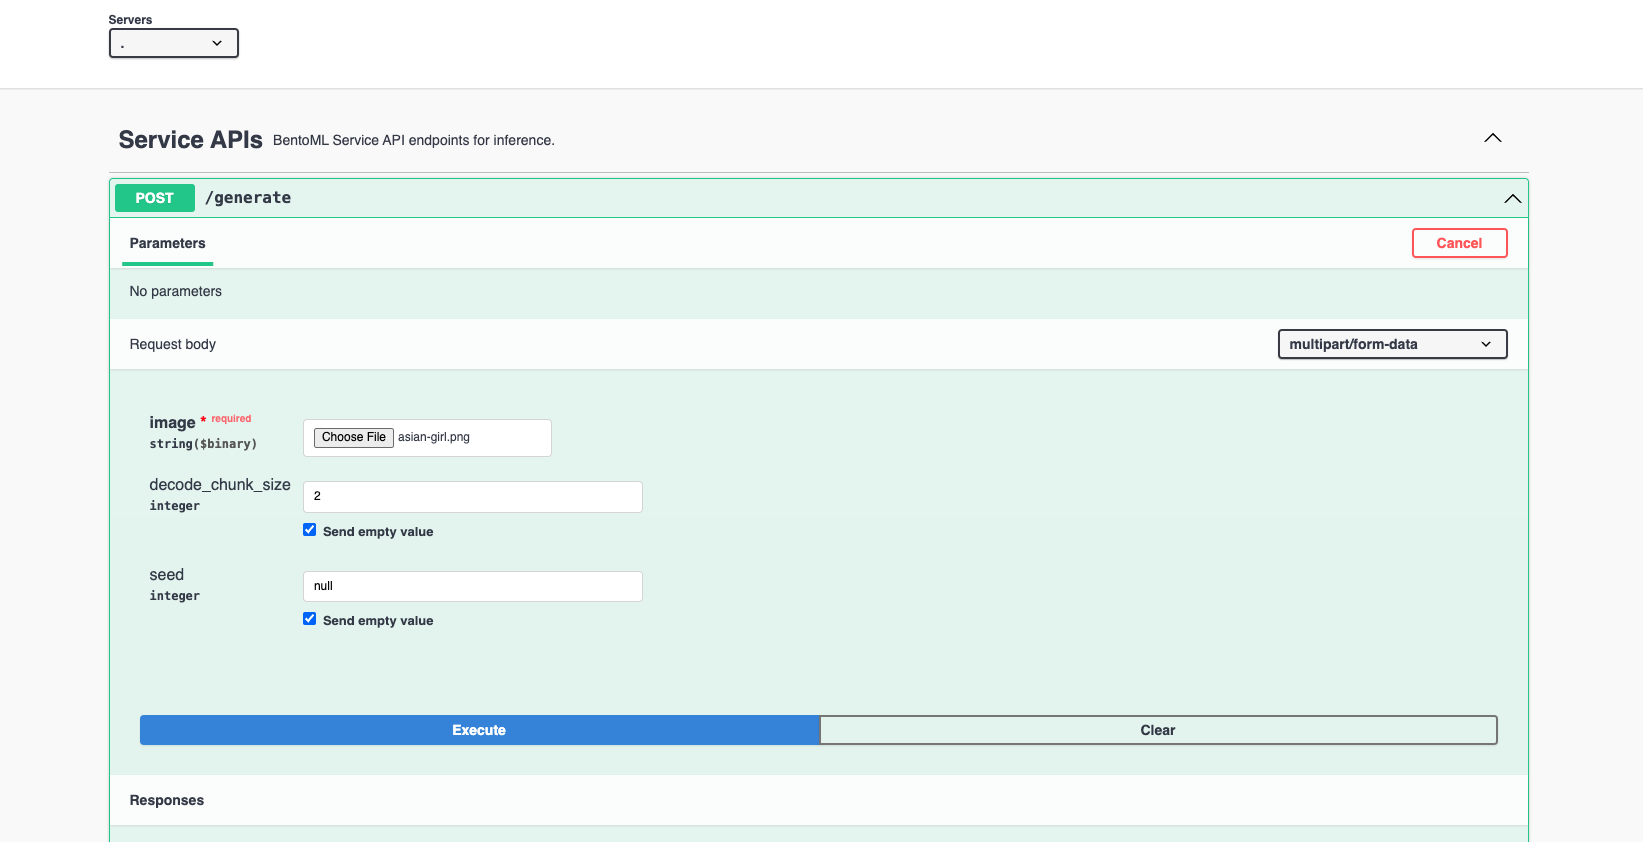
Expected output:

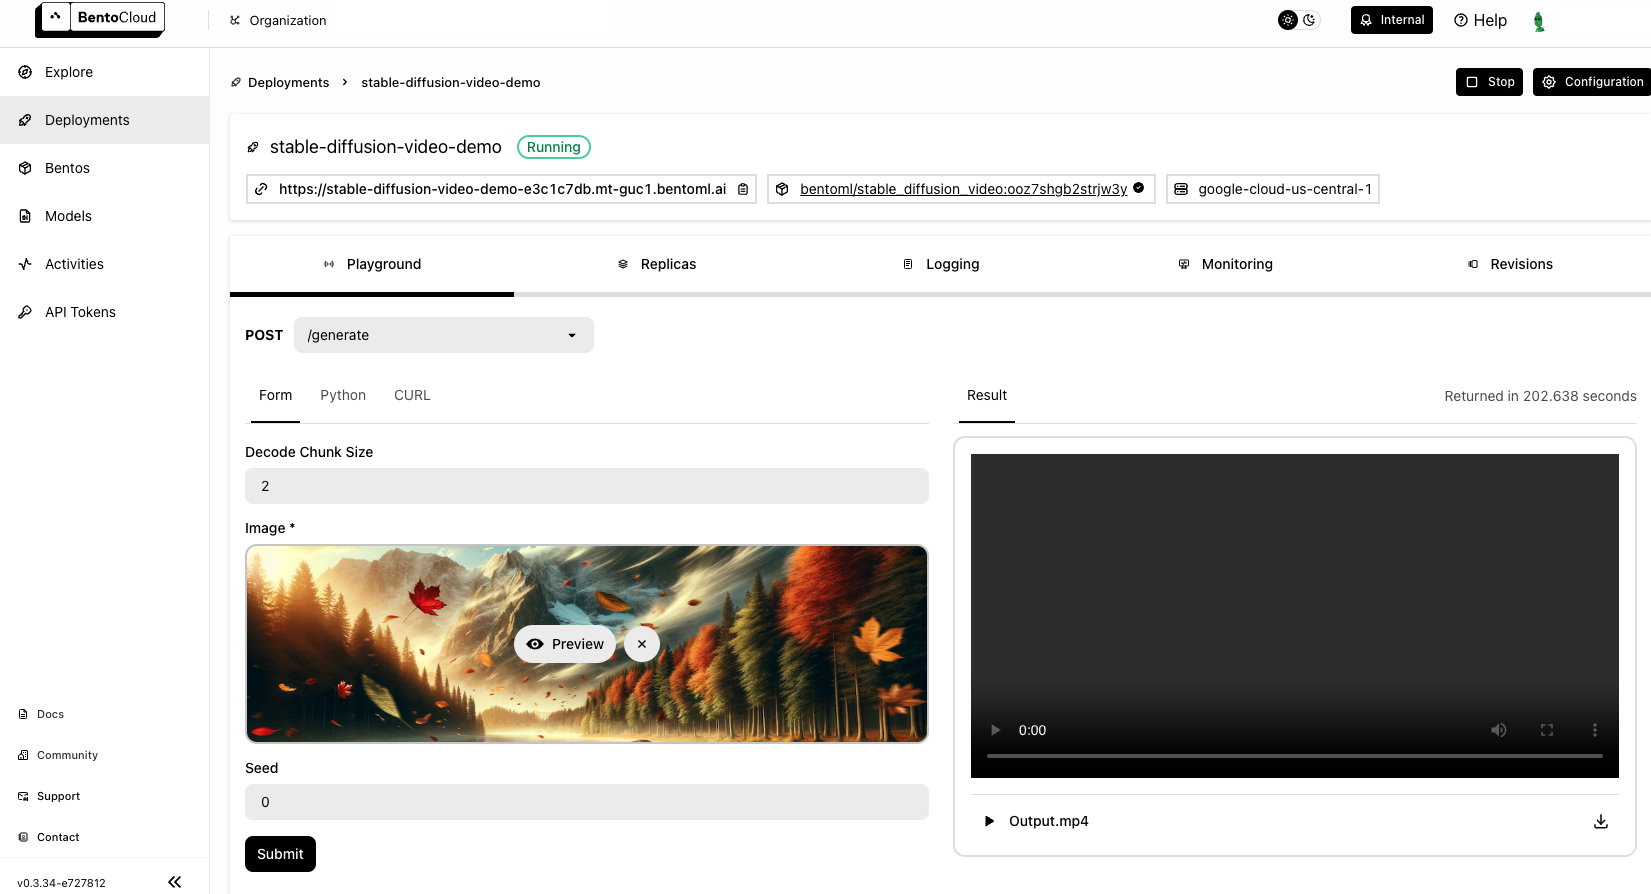
Deploy to BentoCloud#
After the Service is ready, you can deploy the project to BentoCloud for better management and scalability. Sign up for a BentoCloud account and get $30 in free credits.
First, specify a configuration YAML file (bentofile.yaml) to define the build options for your application. It is used for packaging your application into a Bento. Here is an example file in the project:
service: "service:StableDiffusionVideo"
labels:
  owner: bentoml-team
  project: gallery
include:
  - "*.py"
python:
  requirements_txt: "./requirements.txt"
docker:
  distro: debian
  system_packages:
    - ffmpeg
    - git
Create an API token with Developer Operations Access to log in to BentoCloud, then run the following command to deploy the project.
bentoml deploy .
Once the Deployment is up and running on BentoCloud, you can access it via the exposed URL.
Note
For custom deployment in your own infrastructure, use BentoML to generate an OCI-compliant image.